
IOR 测试
次访问
IOR 测试
一 本地文件系统测试
1 安装依赖
1 | sudo apt update && sudo apt install -y git build-essential automake libopenmpi-dev openmpi-bin libaio-dev |
2 克隆并编译 IOR
1 | git clone https://github.com/hpc/ior.git |
3 测试文件系统
1 | # Test ext4 (replace /path/to/ext4/testfile with your ext4 mount path): |
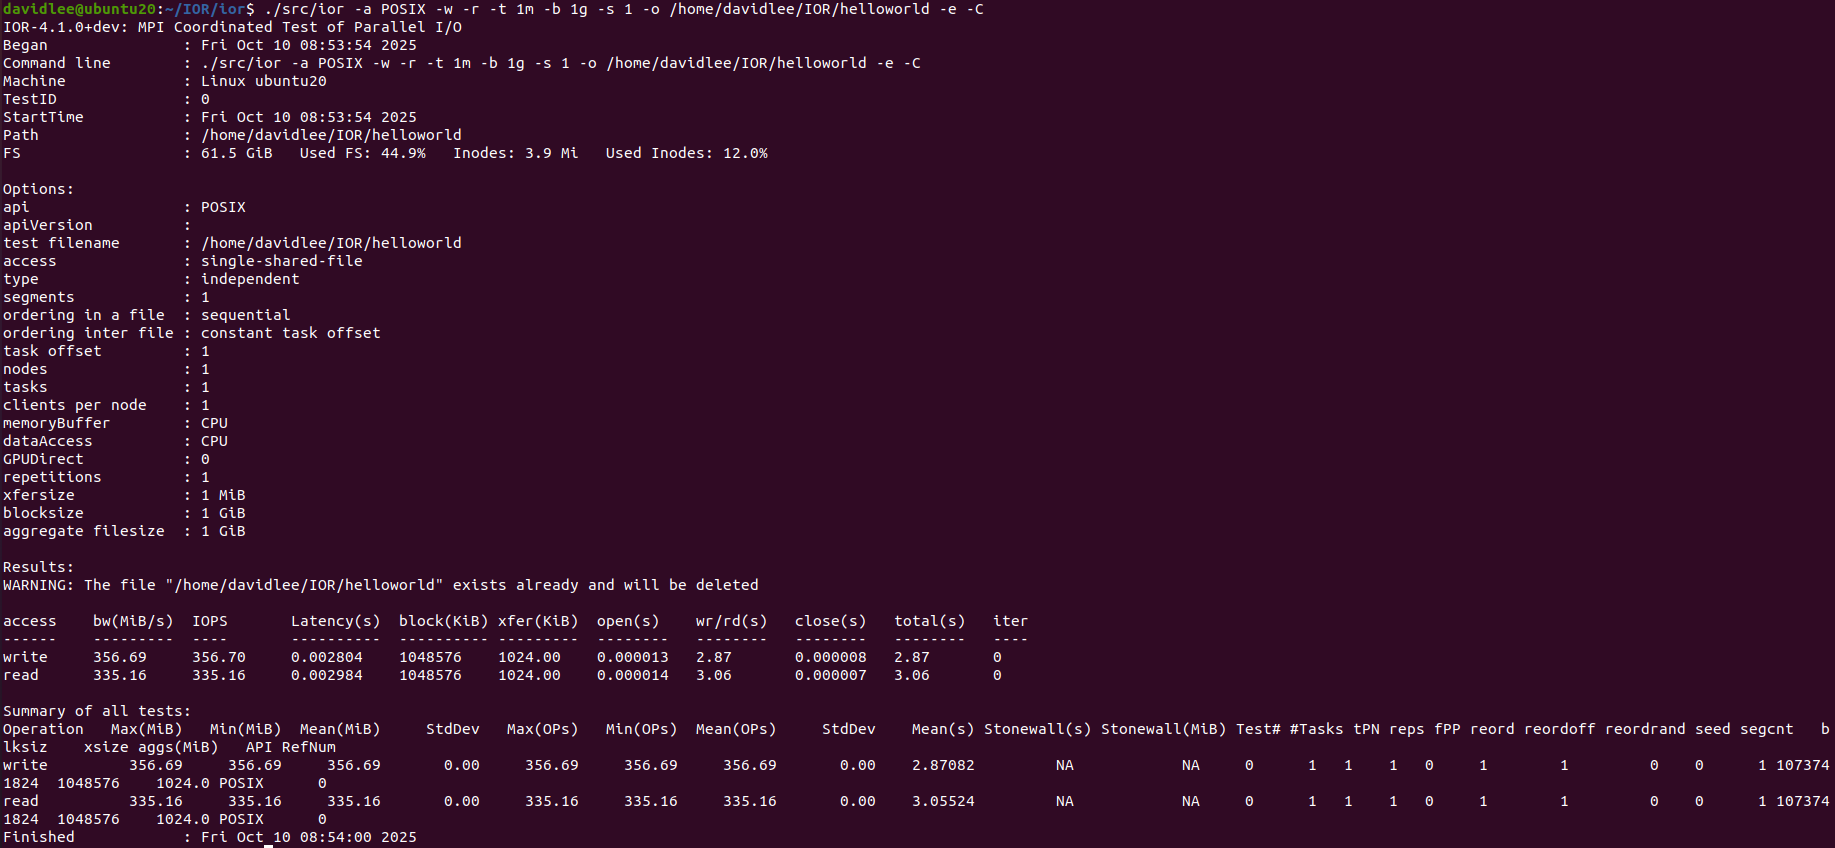
4 测试结果
二 分布式文件系统测试
配置:至少两个节点,节点间能互相ping通
这里使用两台virtualBox模拟两个节点,通过桥接模式连接
ior11作为客户端 ip 地址为 192.168.222.154,ubuntu20作为服务器 ip 地址为 192.168.222.233
文中node1和node2在此测试中分别为ubuntu20和ior11
1 部署 GlusterFS
- 更新系统并添加 GlusterFS PPA(在所有节点上执行)
1 | sudo apt update |
- 安装 GlusterFS 服务器(在所有节点上执行)
1 | sudo apt install glusterfs-server -y |
- 启动并启用 GlusterFS 服务(在所有节点上执行)
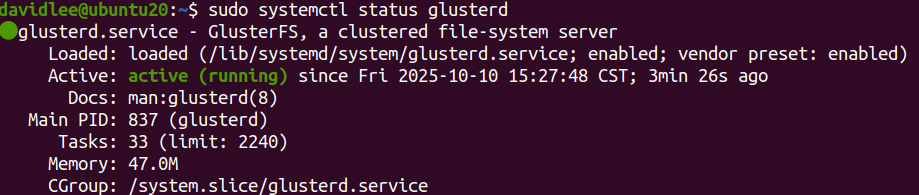
1 | sudo systemctl start glusterd |
- 配置主机名解析(在所有节点上执行): 编辑 /etc/hosts 文件,添加所有节点的 IP 和主机名。例如
1 | sudo vim /etc/hosts |
添加内容如下:
1 | # 替换node和地址为真实的主机名和ip地址 |
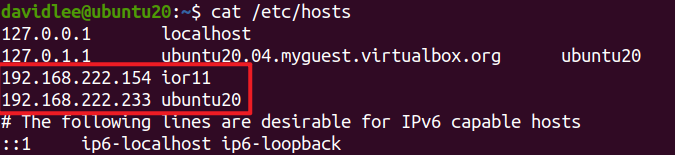
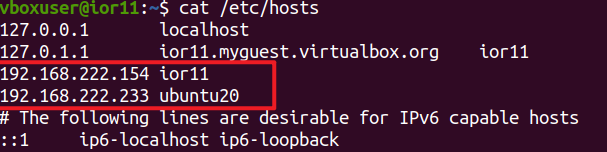
这一步的目的是确保双方能ping通
- 配置防火墙(如果启用,在所有节点上执行): GlusterFS 使用端口 24007-24008、49152 等。
1 | sudo ufw allow from 192.168.1.0/24 to any port 24007:24008 proto tcp |
这一步我没整,因为虚拟机没启用防火墙
- 建立节点间的信任(从服务器节点上执行)
1 | sudo gluster peer probe node2 |
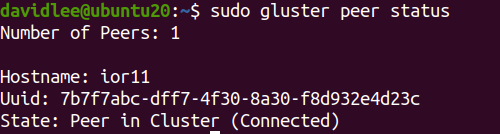
只要能ping通就能连接
- 创建存储砖(brick,在所有节点上执行): 为 GlusterFS 准备专用目录和分区(例如,使用 /data/brick1)。假设您有一个空分区 /dev/sdb:
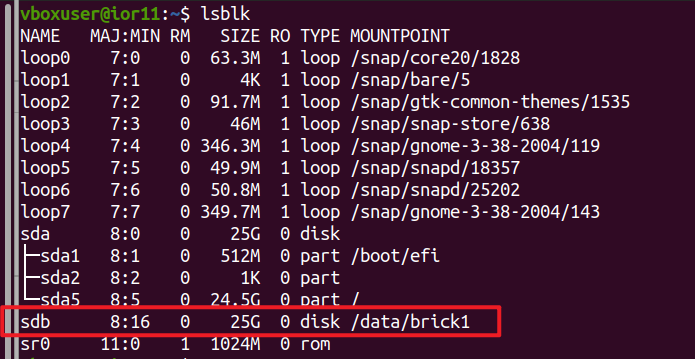
通过在virtualbox中添加虚拟磁盘可以为虚拟机增加一个空分区sdb
1 | # 执行下面命令完成分区创建以及挂载 |
编辑 /etc/fstab 添加自动挂载:
1 | /dev/sdb /data/brick1 xfs defaults 0 0 |
- 创建分布式卷(从服务器节点执行): 这里创建一个简单的分布式复制卷(replicated volume),副本数为 2
1 | sudo gluster volume create test-volume replica 2 node1:/data/brick1 node2:/data/brick1 force |
- 挂载 GlusterFS 卷(在客户端节点或测试节点上执行): 安装客户端(如果不是服务器节点)
1 | sudo apt install glusterfs-client -y |
1 | sudo mkdir /mnt/gluster |
此时就在客户端节点上挂载了服务器端的卷,客户端或服务器写这个卷两边都会同时修改
- 如果重启虚拟机,则需要重新挂载一一遍glusterfs
1 | sudo mount -t glusterfs node1:/test-volume /mnt/gluster |
或者设置自动挂载
1 | sudo vim /etc/fstab |
- 在服务器上使用
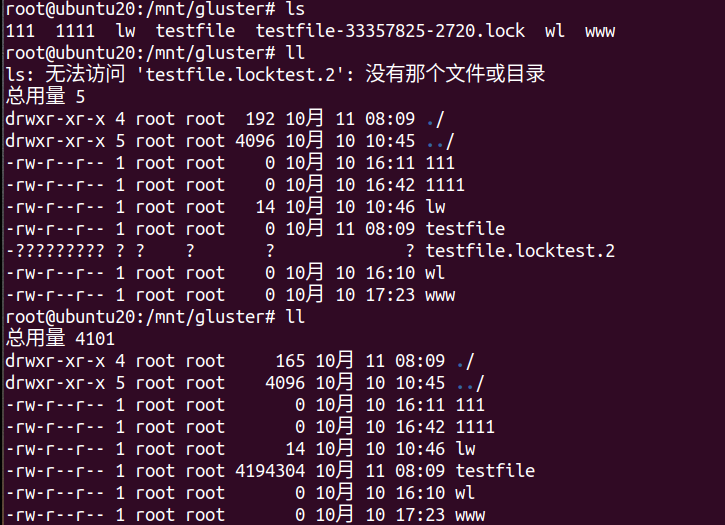
echo "Hello Gluster" > /mnt/gluster/testfile测试是否挂载成功


- 或者使用
mount | grep /mnt/gluster查看是否挂载了 gluster 卷,如果为空则没有挂载

2 安装 MPI 和 IOR
IOR 是一个 I/O 基准测试工具,需要 MPI支持分布式测试,这里使用OpenMPI
- 安装OpenMPI(在所有测试节点上执行)
1 | sudo apt update |
如果需要 SSH 支持分布式运行(多节点)
1 | sudo apt install openssh-server -y |
配置无密码 SSH 时要注意,如果node1或2的ssh配置文件没有设置
PermitRootLogin yes
PasswordAuthentication yes
是无法通过密码 ssh 到 node1或2 上的
修改完ssh配置后,使用sudo sshd -t检查是否有语法错误,然后重启ssh服务
sudo systemctl restart ssh
sudo systemctl status ssh # 检查服务是否运行,无错误
- 安装 IOR(在测试节点上执行,从源代码编译,因为 Ubuntu 仓库中没有直接包): IOR 需要 MPI 支持,所以在配置时指定
1 | sudo apt install git autoconf automake libtool make gcc -y # 安装依赖 |
如果提示 autoconf 版本不正确,则通过以下命令升级autoconf版本
sudo apt update && sudo apt install -y wget tar make m4 perl
wget https://ftp.gnu.org/gnu/autoconf/autoconf-2.71.tar.gz
tar -xzf autoconf-2.71.tar.gz
cd autoconf-2.71
./configure –prefix=/usr/local
make
sudo make install
3 使用 IOR 通过 MPI 测试 GlusterFS 性能
IOR 支持多种 I/O 模式(如 POSIX、MPI-IO),可以测试读/写带宽、IOPS 等。使用 MPI 允许分布式测试(多进程/多节点)
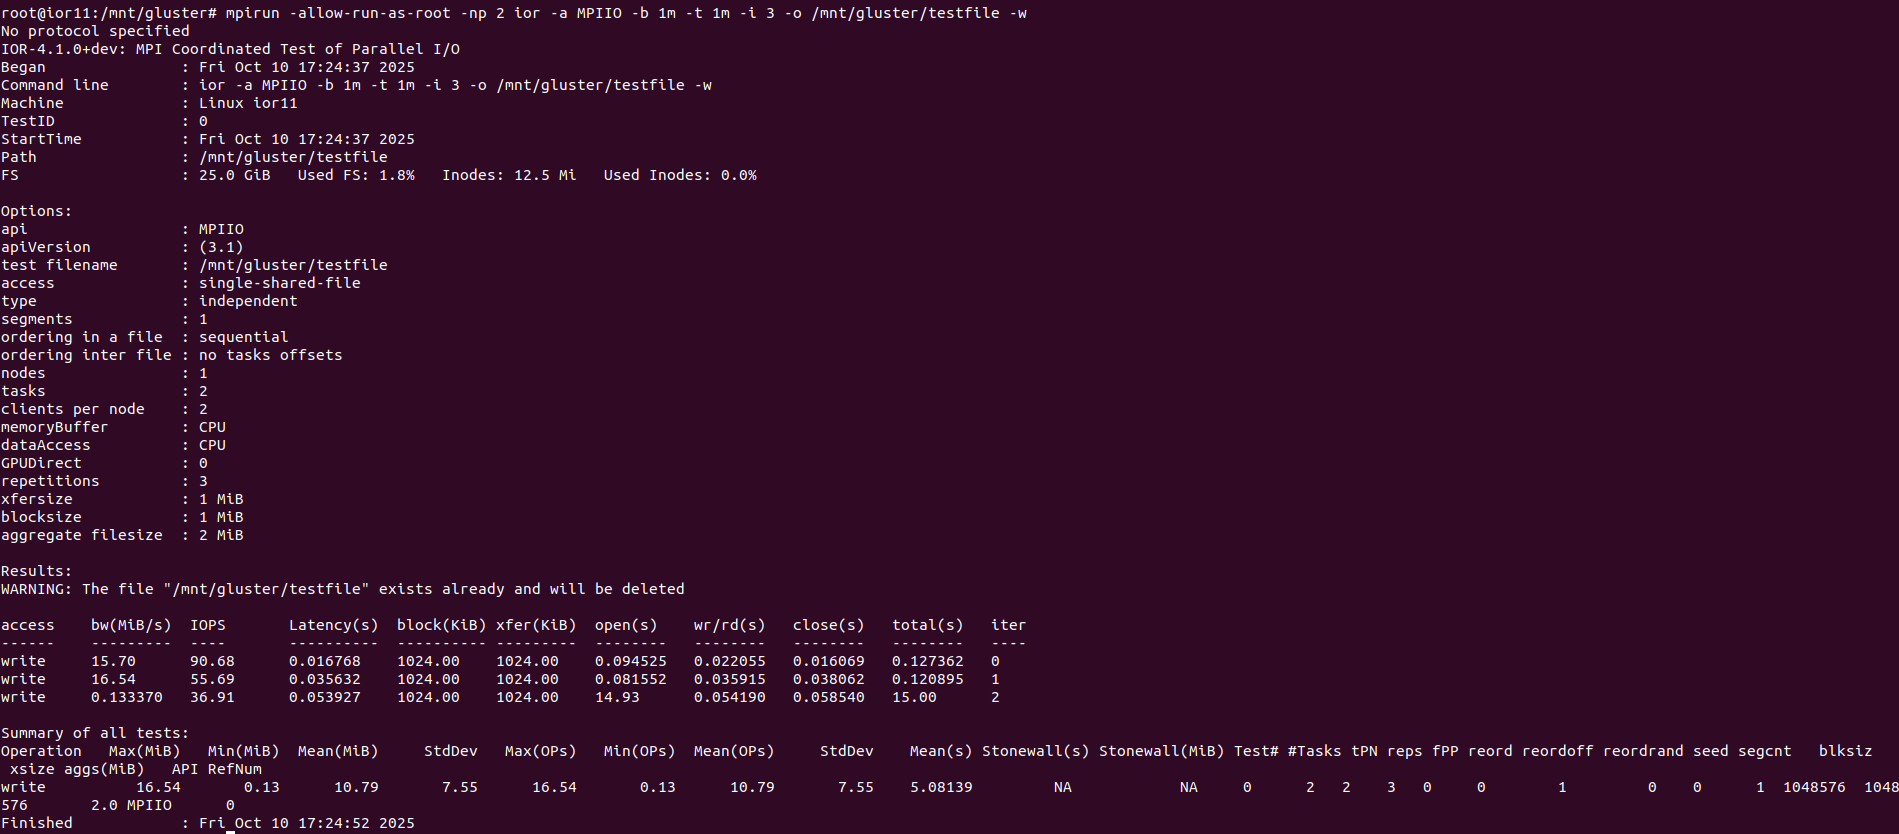
- 单机测试写入性能(MPI-IO 接口,2 进程,块大小 1MB,传输大小 1MB,重复 3 次)
1 | mpirun -np 2 ior -a MPIIO -b 1m -t 1m -i 3 -o /mnt/gluster/testfile -w |
- -np 2: 使用 2 个 MPI 进程(根据您的 CPU 核心调整)
- -a MPIIO: 使用 MPI-IO 接口(适合分布式文件系统)
- -b 1m: 块大小(block size)
- -t 1m: 传输大小(transfer size)。
- -i 3: 重复迭代 3 次。
- -o: 输出文件路径(在 Gluster 卷上)
- -w: 只测试写入。 输出将显示带宽(MB/s)、操作时间等
- 测试读取性能
1 | mpirun -np 2 ior -a MPIIO -b 1m -t 1m -i 3 -o /mnt/gluster/testfile -r |
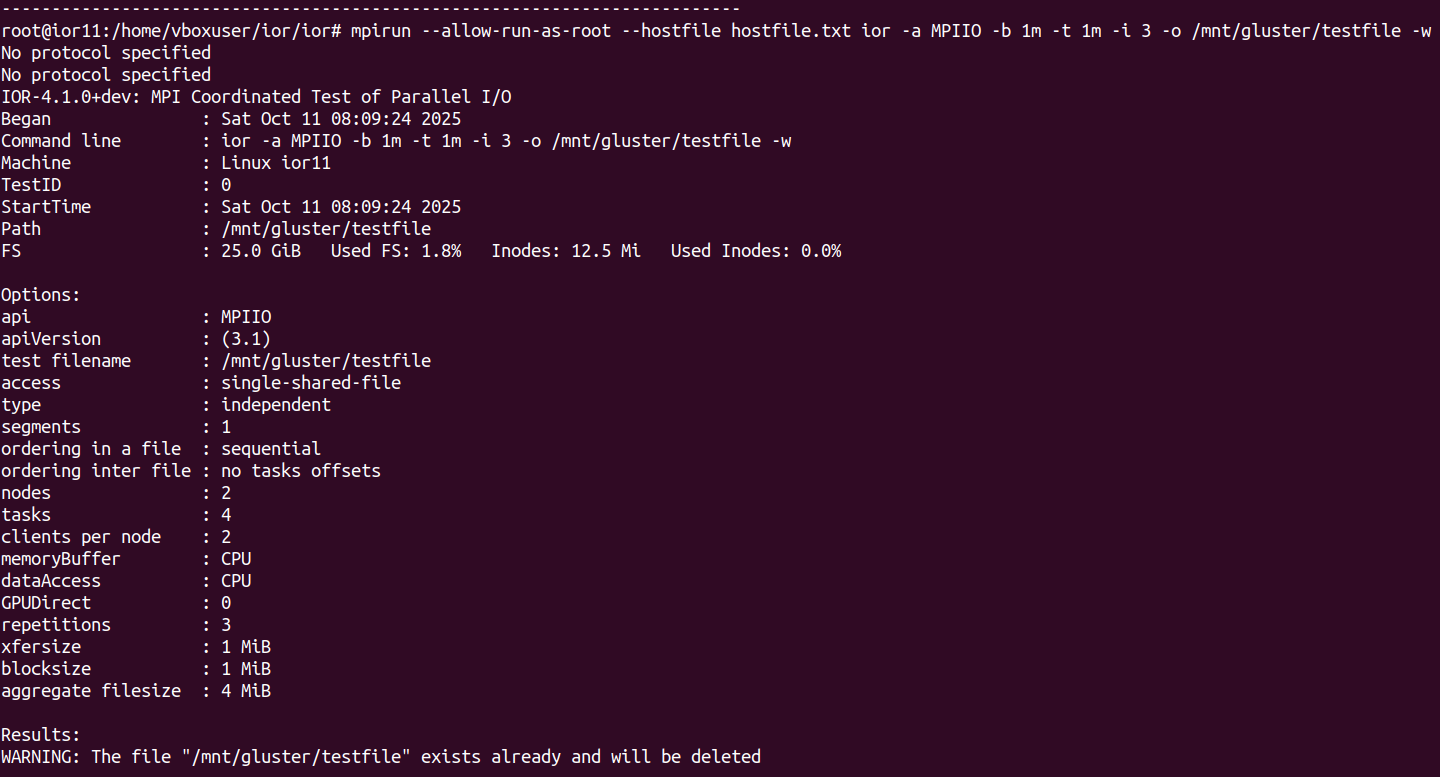
- 多节点测试(重点部分)
使用 -hostfile 指定主机: 创建 hostfile.txt:
1 | node1 slots=2 // slots是可用cpu数量 |
进行测试
1 | mpirun --hostfile hostfile.txt ior -a MPIIO -b 1m -t 1m -i 3 -o /mnt/gluster/testfile -w |

4 总结
做完了前面的准备工作后,使用ior测试分布式文件系统gluster的性能就这么几步
- 在所有节点上启动 GlusterFS 服务
1 | sudo systemctl start glusterd |
- 挂载 GlusterFS 卷
1 | sudo mount -t glusterfs node1:/test-volume /mnt/gluster |
- 进行测试
1 | # 准备hostfile.txt文件内容 |
1 | # 运行测试 |
三 离线环境下安装 IOR
1 准备环境
需要一台与离线服务器架构和系统版本系统的机器,以现在这台离线服务器为例,它是ubuntu 22.04的系统版本,然后架构为aarch64即arm架构的,因此构建一个相同环境的机器。由于大部分系统不是arm架构的,所以可以采用在虚拟机上使用docker+qemu模拟的方案构建一个相同环境的机器。
使用 Docker 的 ARM64 模拟环境(基于 QEMU):
1️⃣ 启用多架构支持,在有网络的 Ubuntu 或其他 Linux 系统上执行:
1 | sudo apt update |
2️⃣ 运行 ARM64 的 Ubuntu 22.04 容器
1 | sudo docker run -it --platform linux/arm64 ubuntu:22.04 |
2 准备deb包
现在就在一个 ARM64 Ubuntu 22.04 环境里了,然后就可以开始下载软件所必须的依赖包了,对于 IOR 而言,是以下这5个:build-essential automake libopenmpi-dev openmpi-bin libaio-dev
单独下载安装这5个包可能会出现依赖问题,也就是依赖的依赖没有满足,使用 apt-rdepends 可以解决这个问题,使用 apt-rdepends 可以生成完整依赖树
1️⃣ 安装 apt-rdepends
1 | apt install -y apt-rdepends |
2️⃣ 生成依赖列表,这会输出一个去重的包列表文件 all_deps.list,包含所有递归依赖
1 | apt-rdepends build-essential autoconf automake libtool git libaio-dev libopenmpi-dev openmpi-bin libhdf5-openmpi-dev | grep -v "^ " | sort -u > all_deps.list |
3️⃣ 下载所有 deb 包
1 | mkdir -p /ior-offline/debs |
这会下载所有包的 .deb 文件到当前目录(匹配 aarch64 架构)。如果有错误(如某些包不存在),检查列表并移除可选包
4️⃣ 下载 IOR 源码
1 | git clone https://github.com/hpc/ior.git |
5️⃣ 打包所有文件,将 deb 目录和源代码打包成一个压缩包
1 | cd /ior-offline |
6️⃣ 上传到离线服务器之后,在离线服务器上解压缩
1 | tar -xzvf ior-offline-package.tar.gz |
7️⃣ 开始安装ior
1 | cd ior/ |